No Washing Without Hot Water – New Water Heater Required!
During the gas appliance check, we couldn’t get the water heater to work unless we hired a professional AC technician. It was disconnected, checked over, re-installed before declaring it “life extinct”.
The water heater in the van when we bought it didn’t work. It was an American RV water heater. I had replaced it with a new water heater I had bought from the USA and I had successfully fired it up the previous week. When I connected the gas, I had put a twist in the gas supply pipe, so removed the heater to fit a new one, and after this it never fired again! It was most likely a simple fix – either the gas valve or a relay. If you need heat pump installation in Auckland, you should compare prices and read reviews of different services first to find the best one.
The problem was that it was an American RV water heater and we were due to move out of the house and hit the road in a week’s time, so there was not time to have it professionally tested and order replacement parts from the USA.
This left us with a dilemma. American RV water heaters are installed from outside the motorhome and require a large cut out in the side wall about 24″ square, which was already there when we bought the van, and European water heaters don’t!
We had a stark choice to make as to which water heater to buy, which could be delivered to us in time for the gas engineer returning in a week, the day before we had to leave the house. Whichever choice we made it was going to leave a hole in our savings which had already been dented by purchasing a refillable gas system and a SOG unit the previous week.
The available choices of water heater were:
- Truma – gas and electric – capacity of 10 litres but really only 7 litres of usable hot water as the tank refills with cold water during use. This would require new wiring and the side cut out being covered by installing a locker door and an inner wall and insulating the gap between.
- Malaga – gas and electric – capacity of 13 litres with an estimated 10 litres of usable hot water. Would require new wiring and the side cut out modified as above.
- Atwood – gas only – capacity a whopping 22 litres. American RV water heater available from a UK seller. Would fit straight into the existing cut out and the wiring from the old water heater would be in place as it was also an Atwood heater.
If we chose a European model, we would have additional costs of buying a suitable locker door to cover up the existing cut out. It would also require the plumbing inlets and wiring to be rearranged adding even more to the cost. I didn’t have the time available to do this myself as we had a house to pack up! We have the added bonus of being able to heat the water by electricity saving some LPG, but we don’t plan on being plugged in at campsites that often, and the other disadvantage is that the hot water capacity would be limited. Calling experienced workers from Slam Plumbing is a good idea.
It seemed like a no brainer to opt for the Atwood RV water heater. I could easily fit this myself into the existing cut out, connect the 12v supply from the existing switch and connect the existing plumbing as we would be replacing like for like. This would just leave the gas supply to be connected by the gas engineer, who could then certify the appliance. A new Atwood heater was ordered and it had the bonus of being supplied with a shiny new exterior door.

I could have ordered the same model heater much cheaper directly from the USA, even taking into consideration delivery costs and import taxes, but I did not have the luxury of time to wait on delivery.
Even so, the higher priced heater from the UK was still our best option in terms of value when compared to the European heaters.

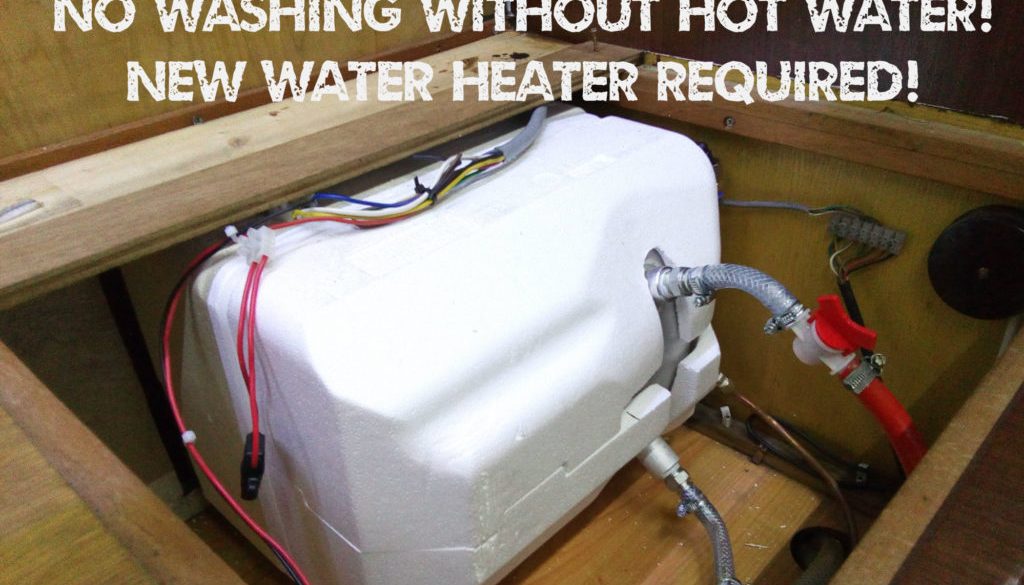
Once the new heater arrived, all I had to do was connect 2 new tapered ends into the tank to connect the water supply hoses. I disconnected the old water heater and the new one slotted perfectly into the existing cut out – even the old mounting screw holes lined up. I placed a strip of mastic tape behind the outside flange to weather seal it and screwed it into place. I attached the new door and the external fit was complete.

Inside, access is under a seat and I connected the cold water inlet hose and hot water outlet hose to the tapered hose connectors. I also took the opportunity to fit an isolator tap to the hot water outlet.
The wiring was simple as there was no 230v supply to worry about and it was just the positive and negative 12v feed plus one additional wire which operated the error lamp in the existing switch if the heater detected a problem.

It was now just a matter of waiting for the gas engineer to connect the gas and test the appliance.