Installing A Solar Panel On A Motorhome
MOTORHOME SOLAR PANEL INSTALLATION – NOT AS DIFFICULT AS YOU MIGHT THINK
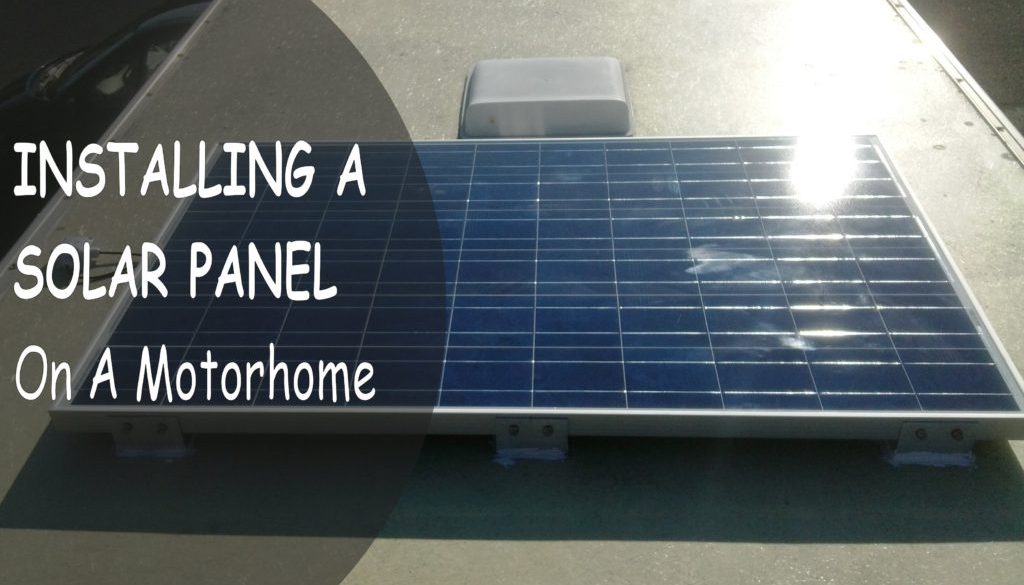
In my last article I explained how I came about acquiring a 250w solar panel for the motorhome. After a year of trepidation I had considered many times having the panel installed by a professional, but the prices quoted were very high.
I would point out that I am not a professional electrician and my work with electrical devices has been very limited. So this post is more of a “how I did” with the help of campingfunzone.com than a “how to do” tutorial.
With the help of other blogs and videos I reckoned that I would be able to attempt to fit it myself. Once I learned that it was essentially a positive and negative wire from the solar panel which fed through the solar charge controller and then straight to the battery, I thought that the process couldn’t be that difficult to carry out, so decided to give it a go.
With only one large solar panel to connect, I didn’t have to think about whether to wire multiple panels in series or parallel.
The first thing to do was to prepare the solar panel for mounting to the roof. I didn’t want to drill any holes into the roof so used the suggestion of Adam from his installation blog post on Europe by Camper about fixing right angled brackets to the solar panel and the brackets would later be fixed to the roof with Sikaflex 512 adhesive sealant. I had looked at the stock plastic solar panel mounting brackets, but thought these looked rather lightweight for such a large and heavy panel.
Adam even kindly included a link to Forward Metals who were excellent in supplying the aluminium right angle pre-cut to the size I needed for the brackets. I ordered up 8 brackets because of the size of the solar panel deciding to use 3 brackets down each long side and a single central bracket on the shorter ends.
I opted for unequal right angle bracket ordering 3 inch by 2 inch. This would allow me to attach the 3 inch side to the solar panel to give me a slightly higher lift than the expert from heating and air conditioning Chicago achieved to allow for adequate air flow under the panel for cooling purposes which lead us on buying these tonneau bed cover comes highly regarded from a lot of car sites, Source: Carlypso, customized for the type of your car or motorhome.
Two of my favourite fixings for all applications in the van have been pop rivets and threaded rivnuts which I have used in a multitude of applications. I had decided to use 8mm threaded rivnuts in the side of the solar panels, which meant I could bolt the brackets to the solar panel using M8 stainless steel flange head bolts. This would allow me to easily unbolt the solar panel if I wanted to remove it for a different vehicle in the future.

First of all, I had to drill the holes in each of the brackets for 2 bolts. Having marked out the hole positions, I used my pillar drill to drill through the aluminium brackets. To keep things matched up, I numbered the brackets 1 to 8 and marked a centre line on each bracket. I measured out the positioning of the where I wanted to place the brackets on the solar panel and marked with a line.
I then placed each bracket in turn against the side of the solar panel matching up the centre lines, and marked through the holes in the brackets with a Sharpie marker to give me the drilling positions for the 8mm threaded rivets, numbering each position with the corresponding number of the bracket used as a template.

It was going to prove slightly difficult to have all the holes drilled perfectly accurately, as the sides of the solar panel would have to be free drilled with a hand drill, which I found out later in the process. It was then a matter of drilling out the holes in the side frame of the solar panel, then fitting the threaded rivnuts with the riveting tool.

Applying the bracket to the side of the solar panel is when I found out that a fraction of a mm out in the drilling would not allow the bolt to go through an 8mm hole in the bracket and line up perfectly with the threads in the rivnut fixed into the side of the solar panel.

I would advise if you are going to use this method, to drill the holes in the bracket to 10mm to allow a tiny amount of wiggle room to line up the bolts with the rivnuts correctly. It was quickly back to the drill press to use the 10mm drill through the existing holes in the brackets. This would not compromise the fitting as I was using large flange headed bolts.

Finally, it was an easy process to bolt the brackets to the side of the solar panel, using a spring washer under the head of the bolt to prevent any vibrations from working them loose. You will also see that I fitted the brackets with their bases pointing in under the solar panel rather than pointing out so that the overall footprint of the solar panel was not increased on the roof.

Before lifting the solar panel on to the roof, the next stage was to do some planning to find the best place to locate the panel, as well as finalising cable entry point into the van etc.
Whenever you go out with your truck, camper or motor home remember to have with you the contact of a truck accident lawyer just in case something happens in the road.
I wanted the cable to enter into a specific top ceiling cupboard for a few reasons. It was the end cupboard in the row and I could use this as my technology cupboard for a computer wifi etc. I was also going to locate the charge controller here. Another reason for this choice was that there was existing conduit cable access from the top cupboard down the wall to the seating area and then just a short run from there under the seats and through the floor to the battery box.
Rather than trying to measure the position on the roof (and maybe getting it wrong because I would have to take the wall thickness into account), I used a long 4mm drill bit and drilled a hole up through the cupboard ceiling and out the roof. I loosened the drill chuck and left the drill in place as a marker.
Having checked the proposed positioning of the solar panel relative to the cable entry point (it would sit immediately behind the front skylight), it was time to manoeuvre the solar panel on to the roof. Before doing this, I taped a side of the delivery box over the solar panel. This would prevent the sun from hitting it so that no current would be produced through the cables.
Luckily I had arranged for my son to call down and help with this task. He is a fitness instructor and in his early twenties – so he would be able to manage this easier than Michelle and me. If he couldn’t lift it on to the roof, we would have to hire a fork lift truck! I stayed at ground level while Adam climbed on the roof. With my arms outstretched around the panel, I was able to lift it up high enough for Adam to grab the edge and with one sharp pull from him it was up over the side of the van and on the roof. Well done son!


Once we positioned the solar panel, I drew around the brackets with a black marker as this would be where I would load up the Sikaflex. We moved the solar panel out of the way. I first cleaned the surface with alcohol and then applied plenty of Sikaflex inside the marks. It was just now a matter of setting the panel back in place and smoothing out the Sikaflex around the edges of the bracket. Phase 1 complete.


One thing I dislike about solar panels is that the exit cables are both black for the positive and negative terminals. I had purchased a set of short extension cables, one red and one black, but when they arrived, the connection plugs were on the wrong cables! – so the idea of using these had to be ditched. Luckily, with the solar panel placed on the roof and the cable entry point nearby, the existing cables from the panel were going to be more than long enough on their own to reach the charge controller in the top cupboard. So I marked the positive cable with loops of red insulating tape at regular intervals.

It was now time to drill the access hole through the roof. I planned to route the cables through a small IP65 waterproof connection box I had already drilled a 20mm access hole through the back of the box on the pillar drill. I had marked around the protruding 4mm drill bit before removing it, so then used this as a marker to drill a 20mm access hole through the roof. No matter how careful you have been in your planning, this is always the most nerve wrecking part! The drill went straight down and perfectly inside the top cupboard. Result!

I set the waterproof box on top of the hole, marked around it, cleaned the area of the roof with alcohol and applied Sikaflex to stick down the box. Now I just needed to wait a while for the adhesive to start to set before cabling.

As the cables would reach down into the cupboard on their own, I cut the connection plugs off before feeding them through the watertight glands and down through the access hole on the roof. I screwed the lid to the connection box and this was the work on the roof almost complete.

I had originally planned to route the positive cable through a cut-off fuse before entering the charge controller, as a way of disabling the power from the solar panel – but then thought the fuse would be better used beside the battery. But I still wanted a way to disable the power coming from the solar panel before hitting any devices.
It was while I had been thinking of this that I had read an article on the Motorhome Traveller blog. Nick had used an ordinary double pole switch which would isolate both positive and negative cables. Why hadn’t I thought of this simple solution as I have often used double pole switches for other projects! I suppose the idea of using domestic devices inside a motorhome just escapes you most of the time, even if it the simplest solution. So I had bought a double pole switch in time for the installation.

Once you have planned out the routing of the cables, the wiring of a solar panel is a fairly simple task. From the solar panel, I connected the cables to the inlet of the double pole switch then 2 short red and black cables from the outlet of the switch to the panel connections on the solar charge controller. I kept the double pole switch in the OFF position until I had completed the rest of the wiring. Stock solar cable is 4mm square, so I was using the equivalent guage cable for the installation (rated 12v, 41 amp).

It was then a case of routing the cable from the battery output of the charge controller down the wall conduit, under the seating and then drilling a new access hole down through the floor into the battery box, which is in a side locker under the floor of the motorhome. Inside the battery box, I used the breaker fuse on the positive cable and then connected the red and black cables to the positive and negative terminals of the battery.


It was time for the first check. The charge controller was reading the battery voltage! Excellent. The poor old batteries were reading very low – but I knew they were half knackered and would be being replaced soon. However, I still wanted everything connected up and check that all was working correctly. Now it was just a case of climbing back on the roof and removing the cardboard shield from the solar panel. Back inside the van I switched on the double pole switch and the charge controller immediately jumped into action. 3.2 amps were flowing through the charge controller down to the battery at 7.30pm. That would do nicely! By mid morning the next day, I had 2 fully charged leisure batteries. Job done!


Although I have no previous experience of such a task, nor am I a professional electrician, I found this to be a relatively simple job after all my trepidation. I wouldn’t hesitate to do this again and would encourage you to have a go to save yourself a few hundred pounds. If you have any questions, leave them in the comment section below and I will do my best to try and help.
TOTAL COST OF THE PROJECT:
I already owned the pillar drill, power drill, cordless drill and drill bits. Most people will have what is needed to be able to complete the project as a pillar drill is not necessary and you will get invaluable use from your rivnut gun. All items below were sourced from eBay and Amazon.
Solar Panel & Delivery – £106.00
Aluminium Angle Brackets (Inc Cutting & Delivery) – £22.00
Rivnut Gun – £20.00 (multiple uses for fixings)
M8 Stainless Steel Rivnuts – £4.50
M8 Stainless Steel Flange Head Bolts – £3.50
M8 Stainless Steel Spring Washers – £2.50
Sikaflex 512 Adhesive Sealant – £12.50
IP65 Waterproof Junction Box – £4.50
Solar panel extension leads (not used) – £3.50
Double Pole Switch – £5.00
Solar Charge Controller – £20.00
20 amp circuit breaker fuse – £7.00
4mm auto cable red (5 metres) – £3.50
4mm auto cable black (5 metres) – £3.50
Battery ring connectors – £2.00
TOTAL COST – £220
Not a bad investment to provide free power for the foreseeable future! Take away the cost of the solar panel and charge controller and it leaves £94.00 of installation costs.
June 18, 2018 @ 11:59 am
very clever! you have inspired me to fit one to my motorhome.
I hope I find it as easy as you! :o)
June 18, 2018 @ 12:41 pm
Hi Justin, Yes it is an easy enough job. My solar panel was quite large which is why I went for the aluminium L brackets. For a smaller solar panel you can buy plastic corner brackets and side brackets on eBay which are specially made for solar panels. If I were using these, I would use the same process of attaching the brackets to the solar panel first, then bedding them down on the roof with sikaflex. This prevents any drilling and screwing into the roof which could later cause water ingress. The wiring is pretty straightforward from the solar panel to the charge controller and from there directly to the battery. I would use the idea of an isolating switch which I fitted as you can isolate any power coming through the solar panel if you are connected to an EHU. Hope this helps and let me know how you get on. 🙂
May 19, 2020 @ 11:16 am
Have you found the sikaflex with the aluminium fixing adequate since travelling with it? Also that looks like a 39v panel? If you are charging 12v you would be much better with an mppt charge controller.
May 20, 2020 @ 2:15 pm
There have been no issues with the SikaFlex. We have travelled around Europe for 3 years and the panel is just as solid as the day it was installed. The panel is 24v.
July 31, 2020 @ 9:37 am
Thanks for the inspiration. I’m up for this. I too am curious as to your choice of charge controller, both to cope with high volts off this domestic panel, and that mppt would be desirable. I would have seen fit to invest in a victron 75/15. You could always upgrade. And LiFo batteries. I’m interested to know what are your thoughts?
November 12, 2020 @ 3:31 pm
Pushed on by this article I upgraded to a 990×1640 39v 275w panel this summer just gone. I’m fortunate that my vehicle has a rudimentary roof rack with moveable rails. I mounted the panel on the rails and then added some ali angles stuck to the roof and bolted to the rails with a single stainless 6mm clench nut and bolt to give extra support. The Sikaflex on its own makes a very secure fixing on the roof. Very pleased. You would never pull it off. I purchased an Epever 3210N charge controller. I’ve seen 16A @14.2v into my pair of 95Ah batteries with full sun overhead, 7A @ 14v overcast, and very impressed with the charge management of the controller. On a good day I’m running my 120w fridge from 12v too for up to 6 hours and also switch out the split charge relay when driving. I never have to charge the hab batteries from the vehicle alternator anymore. I’ve always got more power than I need for TV, laptop, tablets, phones, lighting hence why I use the fridge to make full use in the day and while driving of any surplus. I solar charge the hab when driving too.
November 14, 2020 @ 8:01 pm
Great to hear. There is no doubt that solar panels have been a game changer for power management on motorhomes and provide much more flexibility for staying off-site.
August 29, 2020 @ 4:00 am
Hi how has the panel faired over time in terms of being secured to the roof. I plan to do the same with a 360w panel but I am being told to use self tappers and sika flex… I worry about water ingress though.
November 12, 2020 @ 2:59 pm
There have been no issues with the SikaFlex. We have travelled around Europe for 3 years and the panel is just as solid as the day it was installed.